
Are you tired of staring at your uneven, bumpy walls but don't know where to start with fixing them? Plaster skimming is a cost-effective and efficient way to smooth out your walls and give your home a fresh, new look. In this article, we will guide you through the steps of plaster skimming and help you achieve professional results with ease.
Learn more: Can You Paint On New Plaster
What Is Plaster Skimming?
Plaster skimming is a method utilized to achieve a smooth and uniform surface on walls and ceilings. It consists of adding a thin layer of plaster over existing surfaces to conceal any imperfections, such as cracks or unevenness. This technique requires thorough preparation, including surface cleaning and the application of a bonding agent. Skimming is usually done in multiple layers, with each layer allowed to dry before applying the next. It is crucial to use proper tools and techniques to achieve the desired outcome. In summary, plaster skimming can revitalize a worn-out wall and produce a flawless and professional appearance.
What Tools And Materials Do You Need For Plaster Skimming?
When it comes to plaster skimming a wall, having the right tools and materials is crucial to achieving a smooth and professional finish. In this section, we will discuss the essential items that you will need for the job. From the type of plaster to the tools for application, we will cover everything you need to know before starting your project. So let's dive into the world of plastering and make sure you have everything you need to get the job done right.
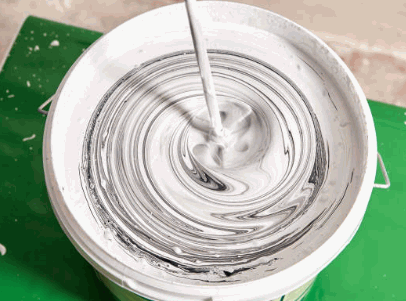
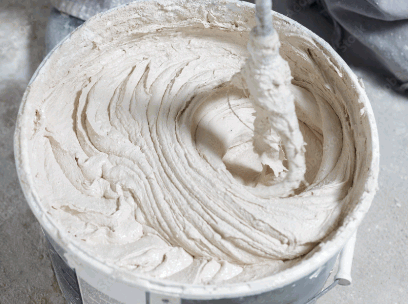
1. Plaster
Plaster is a versatile material used to create smooth, even surfaces on walls and ceilings. Here are the key steps involved in plastering a wall:
- Prepare the wall by cleaning it thoroughly.
- Repair any damages, such as cracks or holes, using a suitable filler.
- Apply a bonding agent to help the plaster adhere to the wall.
- Mix the plaster according to the manufacturer's instructions.
- Apply the first coat of plaster using a trowel, working from the bottom up.
- Smooth out the plaster using a plastering float or trowel.
- Apply a second coat of plaster if necessary, following the same process as before.
- Sand and smooth the surface once the plaster is dry.
To achieve successful plastering, remember to work quickly, clean your tools regularly, use a hawk and trowel for better control, and sand between coats for a smoother finish.
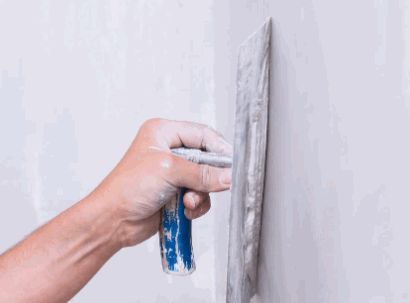
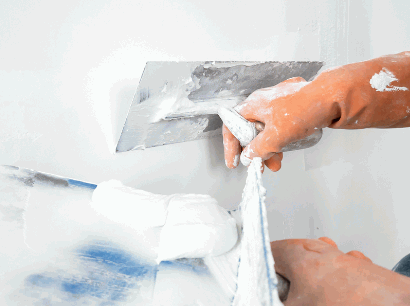
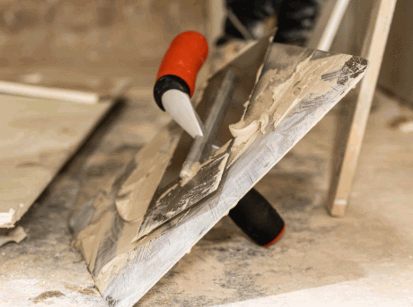
2. Trowel
When it comes to plaster skimming, having the right tools is crucial. The trowel is one of the essential tools you'll need for this task. Here are the steps involved in using a trowel for plaster skimming:
- Clean the trowel before starting to ensure a smooth application.
- Load the trowel with plaster, using the flat side to scoop it up.
- Hold the trowel at a slight angle and apply the plaster to the wall in an upward motion.
- Use the edge of the trowel to smooth out the plaster, creating an even layer.
- Repeat the process, working in small sections until the entire wall is covered.
- Keep the trowel clean throughout the process by periodically wiping off excess plaster.
3. Bucket And Mixing Drill
When it comes to plaster skimming, it is crucial to have the right tools and materials. Follow these steps when using a bucket and mixing drill:
- Measure the required amount of plaster and water according to the manufacturer's instructions.
- Pour the plaster into the bucket.
- Attach the mixing drill to the bucket and mix the plaster until it reaches a smooth consistency.
- Start with a slow speed and gradually increase it to prevent splashing.
- Continue mixing until the plaster is free of lumps and bubbles.
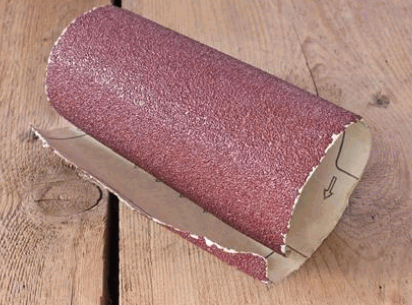
4. Sandpaper
Sandpaper is a crucial tool for plaster skimming as it is used to create a smooth surface after each coat is applied. The desired level of smoothness can be achieved by using different grits of sandpaper. For initial sanding, coarser grits such as 80 or 120 can be used to remove any imperfections. For final sanding, finer grits like 220 or 320 can be used to achieve a smooth finish. It is important to sand gently and evenly to avoid creating uneven patches or damaging the plaster. I learned this the hard way when I used sandpaper with a grit that was too coarse, resulting in a rough surface that required additional coats of plaster to fix.
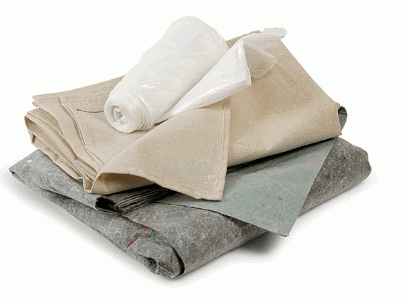
5. Drop Cloths
When undertaking a plaster skimming project, drop cloths are essential to protect your floors and furniture from any potential mess or damage. Here are the steps to properly use drop cloths:
- Prepare the area: Clear the room of any furniture or objects that may obstruct your work.
- Lay out the drop cloths: Unfold the drop cloths and cover the entire floor area, ensuring they overlap to provide a seamless barrier.
- Tape down the edges: Use masking tape or painter's tape to secure the edges of the drop cloths to the baseboards or walls, preventing them from shifting during the plaster skimming process.
- Secure corners and seams: If necessary, use additional tape or clamps to secure the corners and seams of the drop cloths, ensuring they stay in place.
- Perform the plaster skimming: Proceed with the plaster skimming process, knowing that your floors and furniture are protected by the drop cloths.
By following these steps and using drop cloths, you can confidently complete your plaster skimming project without worrying about any unwanted mess or damage caused by the plaster.
How To Prepare The Wall For Plaster Skimming?
Before starting the process of plaster skimming a wall, it is crucial to properly prepare the wall to ensure a smooth and durable finish. In this section, we will discuss the necessary steps to prepare the wall for plaster skimming. First, we will cover the importance of cleaning the wall thoroughly. Then, we will go over how to repair any damage on the wall surface. Finally, we will explain the process of applying a bonding agent to promote adhesion between the plaster and the wall. These steps are essential for achieving a professional-looking skimmed wall.
1. Clean The Wall
Cleaning the wall is an essential step before plaster skimming. Follow these steps to ensure a clean surface for a successful plaster skimming project:
- Remove any loose paint, wallpaper, or debris from the wall.
- Use a mild detergent mixed with water to wash the wall. Gently scrub with a sponge or soft cloth to remove dirt and grease.
- Rinse the wall with clean water to remove any remaining soap residue.
- Allow the wall to dry completely before proceeding with the plaster skimming process.
Remember, a clean wall provides a smooth and even surface for the plaster to adhere to, leading to a professional-looking finish.
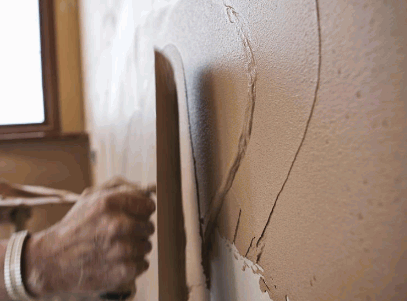
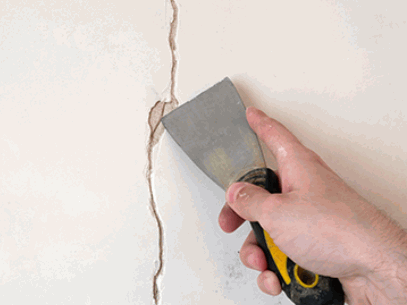
2. Repair Any Damages
Repairing any damage on the wall is a crucial step in the plaster skimming process. Here are the steps to follow:
- Clean the damaged area by removing any loose plaster or debris.
- Inspect the area for any cracks, holes, or uneven surfaces and repair them accordingly.
- Fill the cracks and holes with a suitable filler or joint compound.
- Smooth out the filler using a putty knife or trowel, ensuring it is level with the surrounding wall.
- Allow the filler to dry completely before proceeding with the plaster skimming process.
By carefully repairing any damages, you will ensure a smooth and flawless plaster skim on the wall.
3. Apply A Bonding Agent
To properly prepare a wall for plaster skimming, the application of a bonding agent is crucial. Here are the steps to apply a bonding agent:
- Clean the wall by removing any dust, debris, or loose material.
- Apply the bonding agent to the wall using a paintbrush or roller, ensuring even coverage.
- Allow the bonding agent to dry according to the manufacturer's instructions.
Applying a bonding agent creates a strong bond between the wall and the plaster, preventing it from cracking or peeling. It also enhances the adhesion and durability of the plaster skim coat.
What Are The Steps To Plaster Skim A Wall?
Plaster skimming is a popular technique used to achieve a smooth and even surface on walls. If you’re looking to update the look of your walls, learning how to plaster skim is a valuable skill. In this section, we will outline the necessary steps to successfully plaster skim a wall. From mixing the plaster to applying multiple coats and finishing touches, we’ll guide you through the process and offer helpful tips along the way.
1. Mix The Plaster
Mixing the plaster properly is crucial for a successful plaster skim. Follow these steps to ensure a smooth and consistent mixture:
- Gather all the necessary materials, including plaster, a mixing bucket, water, and a mixing drill.
- Measure the appropriate amount of plaster and place it in the mixing bucket.
- Gradually add water to the plaster, following the manufacturer's instructions for the correct water-to-plaster ratio.
- Use a mixing drill at a low speed to mix the plaster and avoid excessive air bubbles.
- Continue mixing until the plaster reaches a smooth and creamy consistency.
- Check the mixture for any lumps or dry spots, and mix further if needed.
Properly mixed plaster will provide an easy-to-work-with texture and ensure a successful plaster skim.
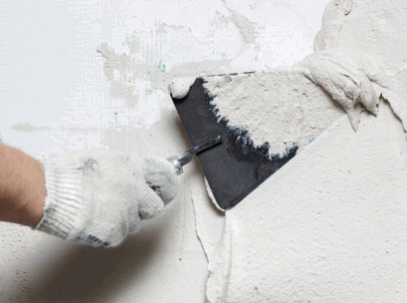
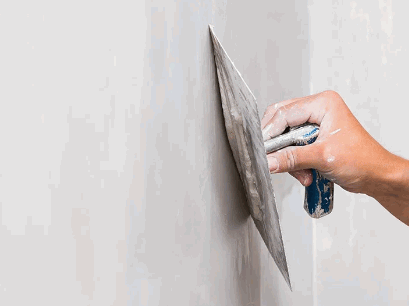
2. Apply The First Coat
To begin the process of plaster skimming a wall, follow these steps:
- Mix the plaster according to the manufacturer's instructions.
- Using a trowel, apply the first coat of plaster to the wall in an even layer.
- Spread the plaster evenly, ensuring that all gaps or imperfections in the wall are filled.
- Smooth out the surface of the plaster using the trowel, creating a flat and even coat.
- Check for any areas that may require additional plaster and apply as needed.
3. Smooth Out The Plaster
Smooth out the plaster by following these steps:
- After applying the first coat of plaster, wait for it to partially dry.
- Use a plastering trowel to lightly dampen the surface with water.
- Gently press the trowel against the plaster and move it in a circular motion to smooth out any bumps or imperfections.
- Continue this process until the surface is even and smooth.
- Allow the plaster to fully dry before applying the second coat.
To achieve the best results, consider these suggestions:
- Keep the trowel clean throughout the process to avoid transferring any dried plaster onto the surface.
- Take breaks in between coats to allow the plaster to set properly.
- Use a sanding block to lightly sand the surface before applying the second coat for an even smoother finish.
4. Apply The Second Coat
When plaster skimming a wall, applying the second coat is a crucial step for achieving a smooth and even finish. Here is a step-by-step guide on how to apply the second coat:
- Once the first coat is dry, mix a fresh batch of plaster according to the manufacturer's instructions.
- Start at the top and use a trowel to apply the second coat of plaster in smooth, even strokes.
- Make sure the second coat is slightly thicker than the first to fill in any imperfections or uneven areas.
- Use the trowel to feather the edges of the plaster, blending it seamlessly with the surrounding wall.
- Allow the second coat to dry completely before moving on to sanding and finishing.
Pro-tip: Before applying the second coat, lightly mist the first coat with water to improve adhesion and create a stronger bond between the layers.
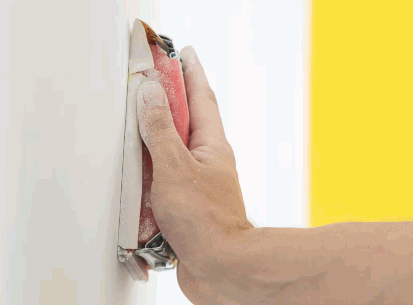
5. Sand And Smooth The Surface
To achieve a smooth surface when plaster skimming a wall, follow these steps:
- Sand the surface using fine-grit sandpaper to remove any rough areas or imperfections.
- Wipe away the dust with a clean cloth or vacuum to ensure a clean surface.
- Apply a thin layer of joint compound or plaster over the wall using a trowel.
- Smooth out the plaster using a trowel or plastering float, working in a circular motion.
- Allow the first coat to dry completely before applying a second coat, if necessary.
- Sand the surface again, using a finer grit sandpaper, to achieve a smooth finish.
- Wipe away any dust and debris, and your wall is ready for painting or wallpapering.
Pro-tip: For an even smoother surface, wet the sandpaper slightly before sanding to reduce dust and improve the sanding action.
What Are The Tips For A Successful Plaster Skim?
When it comes to plastering a wall, the finishing touch of a smooth skim can make all the difference. But what are the tips and techniques for achieving a successful plaster skim? In this section, we will cover the essential tips that will help you achieve a smooth and flawless surface. From working quickly to using the right tools, we’ll discuss the key elements that will make your plaster skim a success. So, let’s dive in and learn how to plaster skim a wall like a pro!
1. Work Quickly
To efficiently and effectively plaster skim a wall, follow these steps:
- Prepare all materials and tools before starting.
- Apply the plaster in small sections to prevent it from drying too quickly.
- Use long, smooth strokes with the trowel to evenly spread the plaster.
- Avoid overworking the plaster, as this can make it difficult to smooth out.
- Regularly clean your tools to prevent dried plaster from interfering with the application process.
For optimal results, keep in mind to:
- Practice and improve your technique to become more efficient over time.
- Work in a well-ventilated area to ensure proper drying of the plaster.
- Follow all necessary safety precautions, including wearing protective gear and using a dust mask.
2. Keep Your Tools Clean
To ensure a successful plaster skim, it is crucial to keep your tools clean throughout the process. Here are some steps to follow:
- Regularly wipe down your trowel with a damp cloth to remove any excess plaster.
- Use a bucket of clean water to rinse off your trowel and other tools between applications.
- Keep a separate bucket of water nearby to clean your tools during breaks or when switching tasks.
- Inspect your tools regularly for any build-up or debris, and clean them thoroughly before continuing.
- Store your tools in a clean, dry area after each use to prevent any contamination or damage.
By following these steps to keep your tools clean, you'll ensure a smooth and even plaster skim while prolonging the lifespan of your tools.
3. Use A Hawk And Trowel
Using a hawk and trowel is crucial for achieving a smooth and even plaster skim on a wall. Here are the steps you need to follow:
- Prepare the plaster mixture according to the manufacturer's instructions.
- Hold the hawk, which is a flat rectangular surface, with one hand.
- With the trowel in your other hand, scoop a small amount of plaster from the hawk.
- Apply the plaster onto the wall in an upward motion, starting from the bottom and working your way up.
- Hold the trowel at a slight angle and use it to spread the plaster evenly across the wall's surface.
- Continue applying and smoothing out the plaster in small sections until the entire wall is covered.
- Periodically clean the trowel to prevent dried plaster from affecting the smoothness of the skim.
- Allow the plaster skim to dry completely before sanding and applying additional coats if needed.
4. Sand In Between Coats
To achieve a smooth and flawless plaster skim, it is crucial to sand the surface between coats. Here are the steps to follow:
- Prepare the wall by applying the first coat of plaster and allowing it to dry completely.
- Gently sand the surface using fine sandpaper to remove any imperfections, bumps, or unevenness.
- Clean the wall from any dust or debris resulting from sanding.
- Apply the second coat of plaster to the wall, ensuring an even and consistent layer.
- Repeat the sanding process after the second coat has dried to create a smooth and uniform finish.
Sanding between coats, also known as "Sand in Between Coats", helps to level the surface, remove any roughness, and ensure a seamless transition between layers of plaster. It is an essential step in achieving professional results when plaster skimming a wall.
How Long Does It Take For Plaster Skim To Dry?
The drying time of plaster skim depends on various factors, such as temperature, humidity, and thickness. To ensure proper drying, follow these steps:
- Allow newly applied plaster skim to dry undisturbed for at least 24 hours.
- Ensure good ventilation in the room to avoid excessive moisture.
- Keep doors and windows closed to prevent the plaster from drying too quickly.
- Monitor the drying process, as thicker layers may take longer to dry.
Remember to be patient and allow enough time for the plaster skim to completely dry for a successful finish. Rushing the process may lead to cracking or other issues. Keep in mind that proper drying time is crucial for a smooth and durable finish.
What Are The Common Mistakes To Avoid When Plaster Skimming?
Plaster skimming is a popular method for achieving a smooth and flawless finish on walls. However, it is not without its challenges, and even experienced DIYers can make mistakes during the process. In this section, we will discuss the common mistakes to avoid when plaster skimming. From applying too much plaster to not properly preparing the wall, we'll cover the potential pitfalls and how to overcome them for a successful plaster skim.
1. Applying Too Much Plaster
Applying excessive amounts of plaster when skim-coating a wall can cause various problems. To prevent this, follow these steps:
- Prepare the wall by thoroughly cleaning it and repairing any damages.
- Apply a bonding agent to ensure proper adhesion of the plaster.
- Mix the plaster according to the manufacturer's instructions.
- Use a trowel to apply a thin, even first coat of plaster.
- Smooth out the plaster with a trowel, removing any excess.
- If necessary, apply a second coat while keeping it thin to avoid buildup.
- Sand and smooth the surface between coats to achieve a flat finish.
Plastering has been a popular technique for centuries, with evidence dating back to ancient Egypt. It was originally used for creating artwork and sculptures but eventually became a common method for finishing walls and ceilings. Applying too much plaster can result in a heavy and uneven surface, affecting the overall appearance and durability of the plastered area.
2. Not Sanding Between Coats
When plaster skimming a wall, it is crucial to not skip the step of sanding between coats. Here are the reasons why sanding between coats is important:
- Smoothness: Sanding helps to smooth out any imperfections or unevenness in the plaster surface.
- Adhesion: Sanding creates a rough texture on the first coat, allowing for better adhesion of the second coat of plaster.
- Leveling: Sanding between coats helps to level out any bumps or ridges, ensuring a flat and even finish.
- Finish quality: Properly sanded coats result in a professional-looking and flawless surface.
Remember, taking the time to sand between coats will greatly improve the overall quality and durability of the plaster-skimmed wall.
3. Using The Wrong Plaster
Using the wrong plaster for plaster skimming can lead to unsatisfactory results and potential issues. Here are steps to ensure you use the right plaster:
- Research: Understand the different types of plaster available, such as bonding, finishing, and multi-purpose plasters.
- Assess the wall: Consider the surface condition, material, and purpose of the room to determine the appropriate plaster.
- Consult professionals: Seek advice from experts or experienced plasterers to select the most suitable plaster for your specific project.
- Read product labels: Carefully review product descriptions to ensure the plaster matches your requirements and the surface you are working on.
- Test before applying: Always perform a small test patch to assess the compatibility and performance of the plaster on the wall.
4. Not Preparing The Wall Properly
To ensure a successful plaster skim, it is crucial to properly prepare the wall. Here are the steps to follow:
- Clean the wall thoroughly, removing any dust, dirt, or debris.
- Inspect the wall for any damages and repair them before applying the plaster.
- Apply a bonding agent to the wall to create a strong adhesive surface for the plaster.
- Take your time to properly prepare the wall as it will help the plaster adhere better and result in a smoother finish.
Pro-tip: Remember, by not preparing the wall properly, you may encounter issues such as poor adhesion or uneven surfaces. Taking the necessary steps beforehand will ensure a successful plaster skim.