
Hello there, fellow DIY enthusiasts! Are you wondering if it's possible to paint on new plaster? Well, fear not, for you are not alone in this concern. Many of us have encountered this dilemma while renovating our homes or tackling small projects. But worry not, as this article aims to provide you with insights and tips on successfully painting on new plaster with ease.
What Is Plaster?
Plaster is a commonly used building material for coating walls and ceilings. It is composed of a mixture of gypsum, lime, sand, and water, which forms a hard and smooth surface when dried. This material serves as a solid base for painting and adds a more visually appealing finish. It is crucial to allow the plaster to fully dry before applying paint, as wet plaster can cause the paint to crack or peel.
Overall, plaster is a versatile and durable substance that is widely utilized in construction and renovation projects.
What Are The Different Types Of Plaster?
When it comes to plastering, there are various types of materials that can be used to create a smooth and durable surface. Each type of plaster has its own unique characteristics and uses. In this section, we will discuss the different types of plaster, including lime plaster, cement plaster, and gypsum plaster. By understanding the differences between these materials, you can choose the most suitable type of plaster for your project.
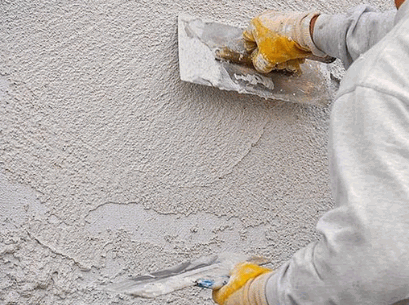
1. Lime Plaster
Lime plaster is a traditional material used for wall finishes and restoration projects. Here are the steps involved in applying this versatile material:
- Prepare the surface by removing any loose or damaged material and ensuring it is clean and dry.
- Mix the lime plaster according to the manufacturer's instructions, ensuring a smooth consistency.
- Apply a thin coat of the lime plaster using a trowel, starting from the bottom and working your way up.
- Smooth out the surface using a float or trowel, ensuring an even and level finish.
- Allow the lime plaster to dry completely, which can take several days or even weeks depending on the thickness.
- Once dry, you can apply additional coats of lime plaster if desired, allowing each coat to dry before applying the next.
- Finish the lime plaster surface by polishing or applying a decorative finish if desired.
Using lime plaster has several benefits, including its eco-friendliness, breathability, and ability to regulate moisture levels in the building. It also creates a unique and textured finish that adds character to any space.
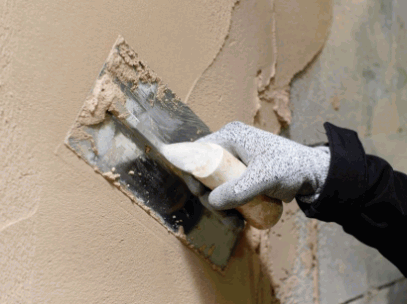
2. Cement Plaster
Cement plaster is a popular type of plaster used for both interior and exterior surfaces. Here are the steps involved in applying cement plaster:
- Prepare the surface by cleaning and removing any loose materials.
- Apply a bonding agent to ensure proper adhesion of the cement plaster.
- Mix the cement plaster according to the manufacturer's instructions.
- Use a trowel to apply the cement plaster onto the surface in even, thin layers.
- Smooth out the surface by using a float or trowel, ensuring an even finish.
- Allow the cement plaster to dry completely before applying any further finishes or coatings.
Cement plaster has been used for centuries, with evidence of its use dating back to ancient Egypt and Mesopotamia. It has proven to be a durable and versatile material for covering and protecting walls and other surfaces.
3. Gypsum Plaster
Gypsum plaster is a commonly used type of plaster in construction. It is derived from gypsum, a naturally occurring soft mineral. One of the notable qualities of gypsum plaster is its smooth and white finish, making it a favored option for interior walls and ceilings. Not only is it easy to handle, but it also provides excellent fire resistance. Furthermore, gypsum plaster has low thermal conductivity, aiding in maintaining a pleasant indoor temperature. In general, gypsum plaster offers numerous advantages, including:
- Durability
- Versatility
- Aesthetic appeal
Making it a top choice for various construction projects.
What Is New Plaster?
New plaster, also known as freshly applied plaster, is a wet and porous surface that has not yet fully dried and cured. It requires special attention before painting as it is still undergoing a chemical reaction, which can lead to cracking if painted too soon. To ensure a successful paint job on new plaster, it is crucial to allow enough drying time, typically 4-6 weeks. During this period, it is important to keep the plaster well-ventilated and free from moisture to avoid any potential issues. Waiting for the plaster to fully dry and cure will result in a smoother and longer-lasting paint finish.
Can You Paint On New Plaster?
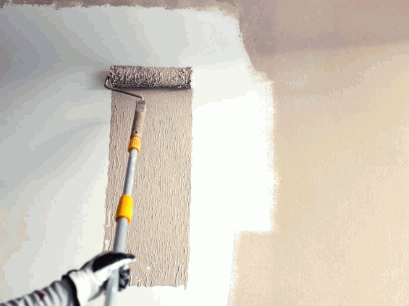
Yes, it is possible to paint on new plaster, but there are some important factors to consider. The most crucial step is to allow the plaster to fully dry, which typically takes 4-6 weeks. It is also recommended to apply a diluted emulsion paint mist coat before the final coats to seal the plaster and create a suitable base for the paint. Lastly, it is important to choose a paint specifically designed for plaster surfaces to ensure proper adhesion and long-lasting results.
1. Factors To Consider Before Painting On New Plaster
Before painting on new plaster, there are several important factors to consider to achieve the best results:
- Surface preparation: It is essential to clean and smooth the plaster surface, removing any dust or debris.
- Primer selection: It is crucial to choose a primer specifically formulated for new plaster to promote adhesion.
- Paint choice: Selecting a suitable paint for plaster is necessary, taking into account factors such as sheen and durability.
- Paint application: The paint should be applied evenly and in thin coats, allowing each coat to dry before applying the next.
- Drying time: It is important to give the paint enough time to dry completely before exposing it to moisture or touching it.
Fun fact: Properly painting new plaster can not only enhance its overall appearance but also protect it from moisture damage.
2. How Long Should You Wait Before Painting On New Plaster?
When it comes to painting on new plaster, it's important to allow sufficient drying time to ensure a successful and long-lasting finish. Here is a step-by-step guide:
- Wait for the plaster to fully dry and cure, which typically takes around 4 to 6 weeks.
- Test the plaster's moisture content using a moisture meter to ensure it's below the recommended level for painting.
- Inspect the plaster for any cracks, imperfections, or flaking, and address them with suitable repairs and sanding.
- Apply a primer specifically designed for new plaster to create a smooth and even surface for the paint to adhere to.
- Select the right type of paint for your desired finish, whether it's matte, satin, or gloss.
- Apply the paint using a roller or brush, ensuring even coverage and avoiding excessive buildup in one area.
- Allow the paint to fully dry according to the manufacturer's instructions before applying any additional coats or finishing touches.
Taking the necessary time and steps before painting on new plaster will lead to a flawless and durable paint job.
What Are The Steps To Paint On New Plaster?
Painting on new plaster can be a tricky task, but with the right steps, it can be done successfully. In this section, we will discuss the necessary steps to prepare and paint on new plaster. From preparing the surface to choosing the right paint, we will cover all the important aspects of this process. By the end, you will be equipped with the knowledge and know-how to paint on new plaster like a pro. So, let's get started!
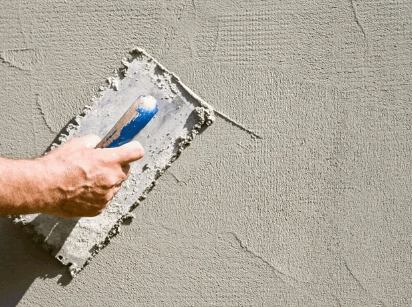
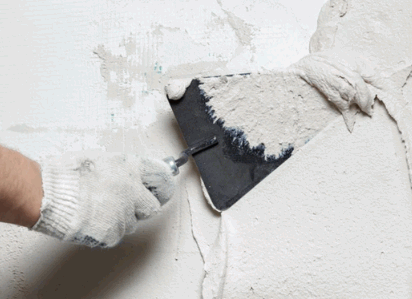
1. Prepare The Surface
Preparing the surface is a crucial step before painting on new plaster. Here are the necessary steps to follow:
- Inspect the surface for any imperfections, such as cracks or holes.
- Fill in any cracks or holes using a suitable filler or joint compound.
- Sand the surface lightly to smoothen any rough areas.
- Clean the surface with a damp cloth to remove dust and dirt.
- Apply a coat of primer to ensure proper adhesion of the paint.
By adequately preparing the surface, you create a clean and smooth canvas for the paint, ensuring a better and longer-lasting finish.
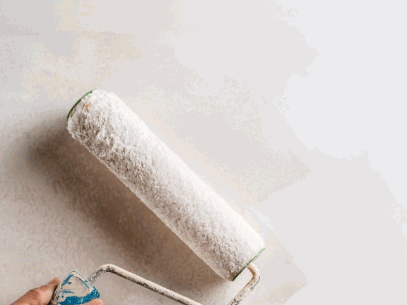
2. Apply A Primer
To ensure a successful paint job on new plaster, it is essential to apply a primer. Follow these steps to do so properly:
- Prepare the surface by thoroughly cleaning it and removing any dust or debris.
- Apply a primer specifically designed for new plaster to promote adhesion.
- Choose the right paint, taking into consideration the desired color and type of finish.
- Apply the paint using a brush or roller.
- Allow the paint to completely dry before adding additional coats or final touches.
Applying a primer before painting on new plaster has numerous benefits. It protects the plaster from moisture and stains, enhances the appearance of the paint job, and allows for better customization of color.
3. Choose The Right Paint
Choosing the right paint is crucial when painting on new plaster to ensure a durable and attractive finish.
- Consider the type of paint: Select a paint specifically designed for use on plaster walls, such as a latex or acrylic-based paint.
- Look for a primer-sealer: Use a primer-sealer to create a smooth and even surface for the paint to adhere to.
- Think about the finish: Decide on the desired finish, such as matte, satin, or gloss, based on personal preference and the room's purpose.
- Consider the color: Choose a color that complements the room's decor and creates the desired ambiance.
- Test the paint: Before committing to a color, test a small area on the plaster to ensure it looks as intended.
By following these steps and considering the right paint, you can achieve a beautiful and long-lasting result when painting on new plaster.
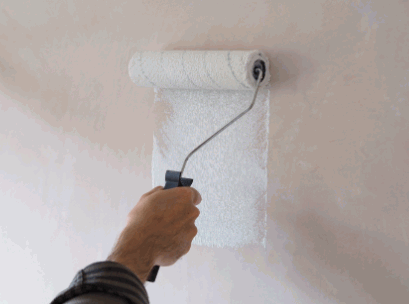
4. Apply The Paint
Applying paint on new plaster is a crucial step to enhance its appearance and protect it. Here are the steps to follow:
- Prepare the surface by cleaning and removing any debris.
- Apply a primer to create a smooth and even surface for the paint.
- Choose the right paint that is suitable for plaster surfaces.
- Apply the paint using a brush or roller, ensuring even coverage.
- Allow the paint to dry completely before applying additional coats or decorations.
By following these steps and applying the paint correctly, you can protect your new plaster from moisture and damage, improve its aesthetic appeal, and have the opportunity to customize the look of your walls. Remember to let the paint dry thoroughly and follow the manufacturer's instructions for best results.
5. Allow The Paint To Dry
Allowing the paint to dry properly is crucial for achieving a smooth and durable finish on new plaster. Here are the steps to ensure proper drying:
- Leave the painted surface undisturbed for at least 24 hours to allow the initial drying to occur.
- Avoid closing windows or turning on fans in the painted area to prevent rapid drying, which can lead to cracking or peeling.
- Ensure good ventilation to promote even drying and prevent moisture buildup.
- Depending on the type and thickness of the paint, it may take anywhere from a few hours to a few days for the paint to fully dry.
- Before applying a second coat or handling the painted surface, always check that it is completely dry to the touch.
Pro-tip: To speed up the drying process, use a dehumidifier or a fan to circulate air in the room, ensuring a faster and more thorough drying of the paint.
What Are The Benefits Of Painting On New Plaster?
Painting on new plaster can have numerous benefits that go beyond simply adding color to your walls. In this section, we will discuss the advantages of painting on new plaster and how it can improve the overall look and longevity of your walls. From protecting the plaster to allowing for customization, we will explore the various benefits that come with painting on new plaster. So, let's dive in and discover the advantages of this common practice.
1. Protects The Plaster
Painting on new plaster offers several benefits, including protecting the plaster, enhancing its appearance, and allowing for customization. To protect the plaster, follow these steps:
- Prepare the surface by cleaning it and removing any dust or debris.
- Apply a primer to create a smooth and even surface for the paint.
- Choose the right paint that is suitable for new plaster, ensuring it effectively protects the surface.
- Apply the paint using even strokes and allow it to dry completely.
- Finally, enjoy the benefits of a protected and visually appealing plaster surface.
Consider using high-quality paints and seeking professional advice for the best results.
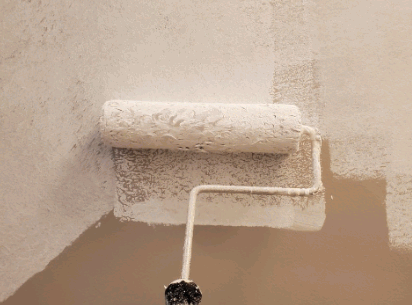
2. Enhances The Appearance
Enhancing the appearance of new plaster can be achieved through a series of steps:
- Prepare the surface by cleaning off any dust or debris.
- Apply a primer to create a smooth and even base for the paint.
- Choose the right paint color and type to complement the desired aesthetic.
- Apply the paint in even strokes, ensuring full coverage of the plaster surface.
- Allow the paint to dry completely before moving or touching the surface.
By following these steps, the appearance of new plaster can be greatly enhanced, providing a fresh and visually appealing finish to any space.
Explore further: How To Fit Plaster Ceiling Rose
3. Allows For Customization
Painting on new plaster allows for customization and adds a personal touch to the space. Here are the steps to follow:
- Prepare the surface by cleaning it and filling any cracks or imperfections.
- Apply a primer to create a smooth and even base for the paint.
- Choose the right paint, considering the desired color and finish.
- Apply the paint using a brush or roller, ensuring an even coat.
- Allow the paint to dry completely before applying additional coats or finishing touches.
Painting on new plaster has several benefits:
- Protects the plaster from damage and wear over time.
- Enhances the appearance of the walls by adding color and texture.
- Allows for customization, as you can choose the colors and finishes that best suit your style.
The tradition of painting plaster dates back centuries, with ancient civilizations using pigments derived from natural sources to create vibrant and decorative designs on plaster walls.